| Moderated by: chrisbet, | Page:  |
|
|||||||
| Re-celling an EN-EL4 battery - Page 3 | |
| Without spilling too much blood... | Rate Topic |
| Author | Post |
|---|
| Posted: Wed Jan 31st, 2018 17:57 |
|
21st Post |
Robert

|
FreeCAD. I was very sceptical at first, it took me a week to get into it but as you can see, while I haven't mastered it, I have produced a reasonable likeness. Once you realise how it works and stop trying to do what you (or I) knew from 2D drafting software, (which I have used for years) it's pretty easy. There are tutorials but I found a French, I think it was, You Tube video, despite not having a clue what he was saying, I followed it easily from that video, yet I had watched numerous video's with English commentary and I couldn't get the hang of it at all.
____________________ Robert. |
||||||||
|
| |||||||||
| Posted: Thu Feb 15th, 2018 10:09 |
|
22nd Post |
Robert
|
OK, some progress after the Pano head project got in the way... I have almost completed re-celling one EN-EL4 battery. I still have to seal the case closed but it's in a charger as I type doing a re-calibration to see if that gets rid of the 'age 4' in the camera menu, battery condition report. Yes, I have had it in the D3, it works as expected, although it was very tight to get in and out, without the casing being glued together. Part of the reason this project stalled was because I was very concerned about the tight space for the connections. While I am reasonably dexterous I am really out of my comfort zone working on such small and critical things like the internals of an EN-EL4 battery. I hate disclaimers... but seriously, unless you actually possess the experience and skills of working with compact electronics, leave the EN-EL4 battery well alone. It isn't easy and remember, you will be working with FULLY CHARGED LIVE BATTERIES; they can occasionally explode and definitely can and do catch fire. I have taken some more photographs which I will process while I wait for the calibration. I had some difficulty in getting the case to close, there is zero spare space in the plastic housing. I had wrapped a small ring of red insulating tape around each cell to identify the live (positive) end, even that had to come off because it was preventing the casing from closing properly. Also I used 'Gorilla Glue' to join the cells together to make it easier to handle the cells, the Gorilla Glue foams slightly and therefore expands. I had to file all the excess glue away as well. If I do another of these, I will make a small jig to hold the batteries together when they are glued. I used one half of the casing and that ended up contaminated with foamed glue which is the devil to get off, especially while avoiding damaging the casing. Like I say, there is no room for anything except the cells.
____________________ Robert. |
||||||||
|
| |||||||||
| Posted: Thu Feb 15th, 2018 15:32 |
|
23rd Post |
Robert
|
Here are some photos of the cells in the EN-EL4 battery. Firstly the original cells which I think were 1900mAh.  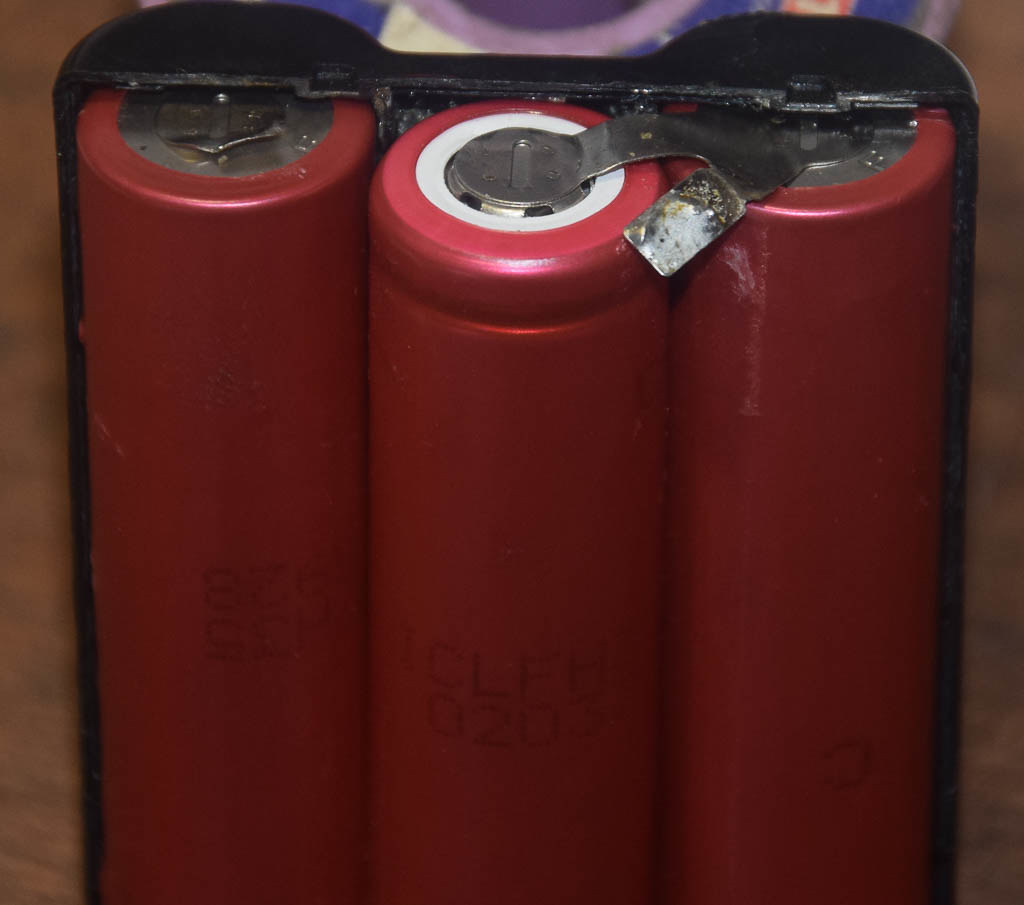 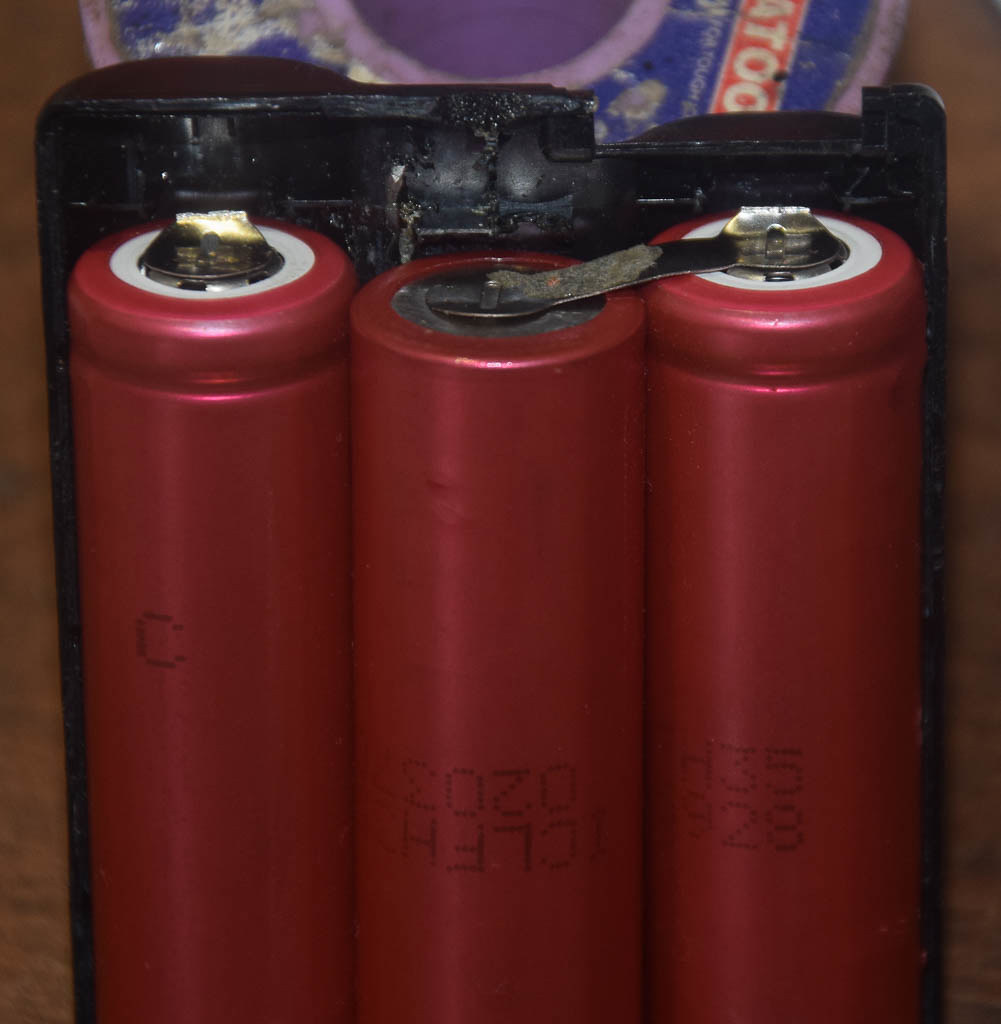 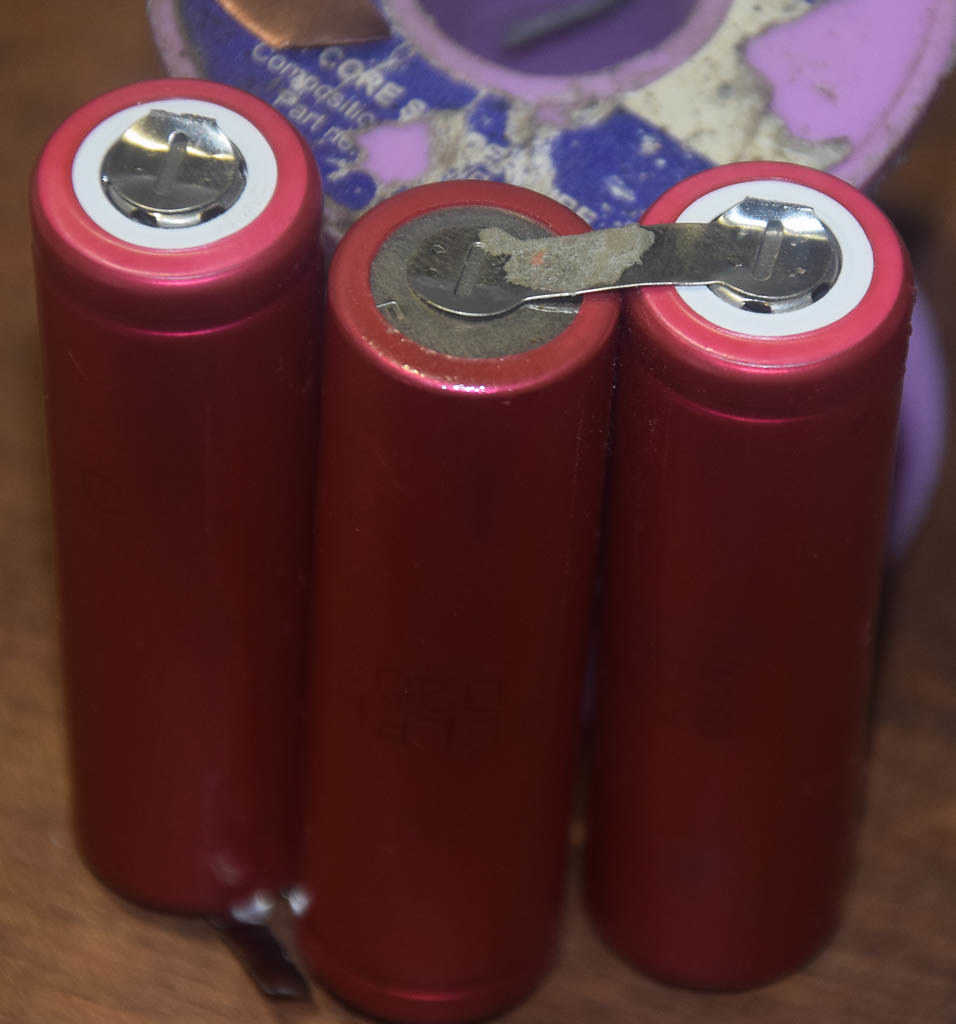 Followed by various views of the replacement Samsung cells, 2600mAh The foaming Gorilla Glue can be clearly seen. 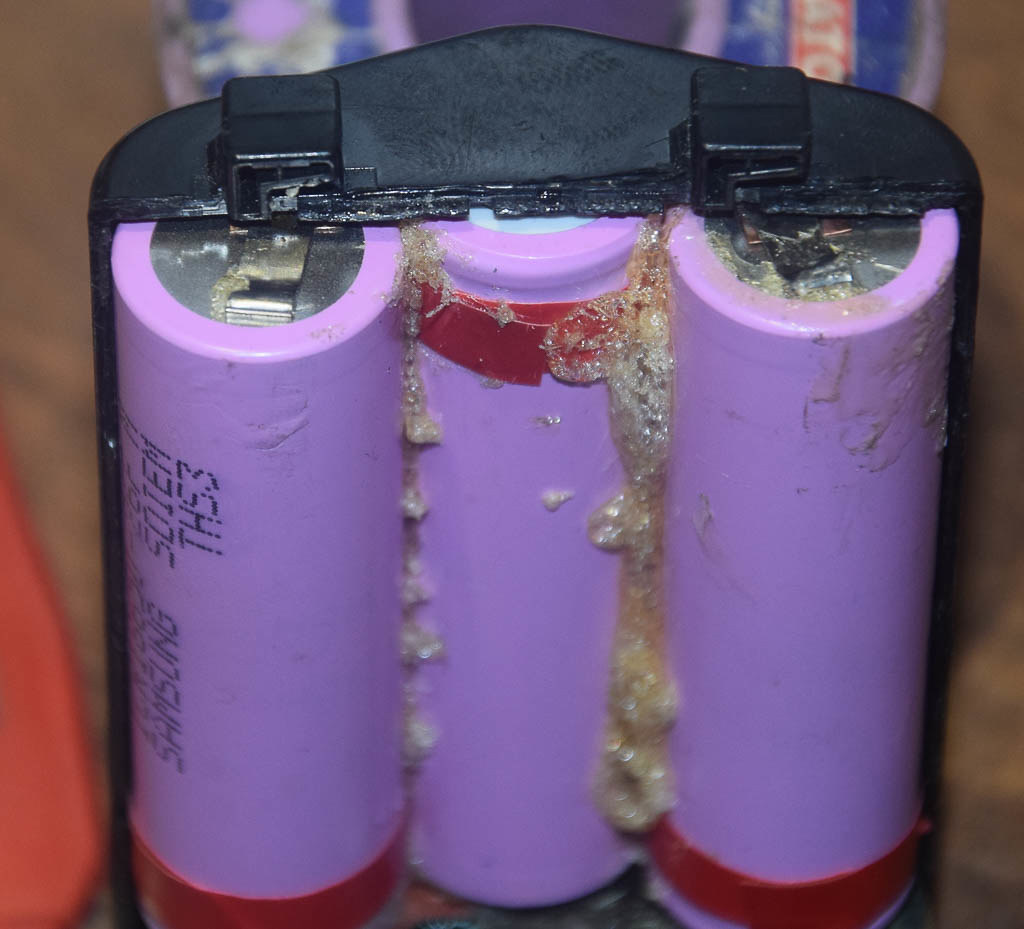 The trickiest and probably most critical joints are shown here, They connect the PCB to the two positive tags at the PCB end of the batteries. The clearance on these is critical as they protrude to the maximum possible and prevent the casings from closing properly if not perfect. 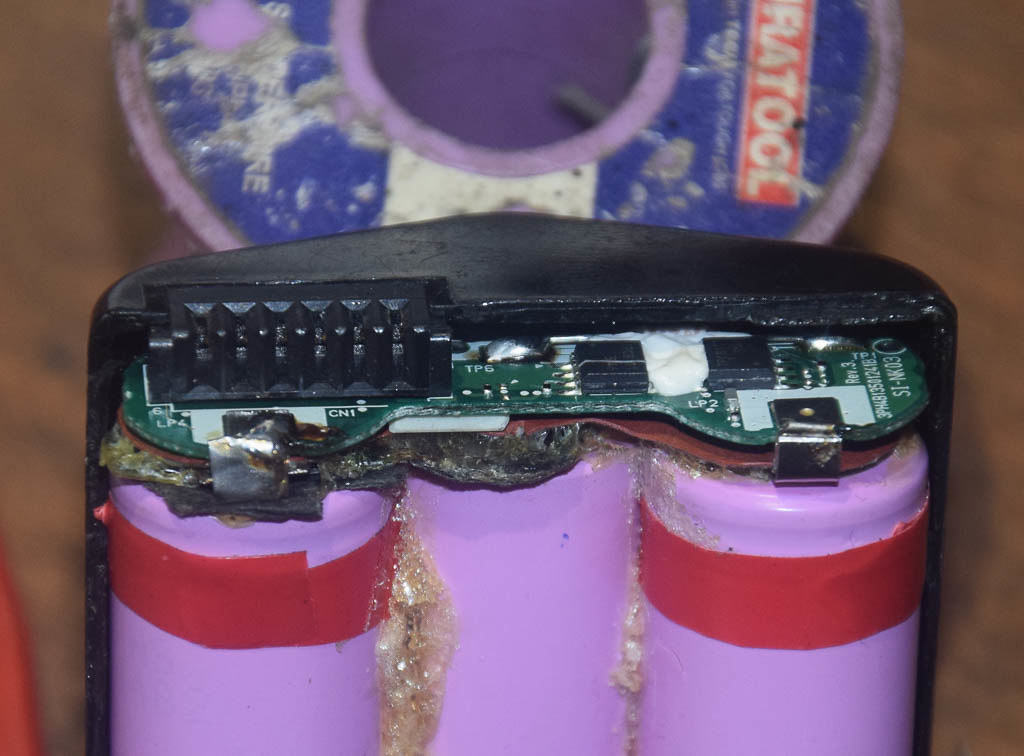  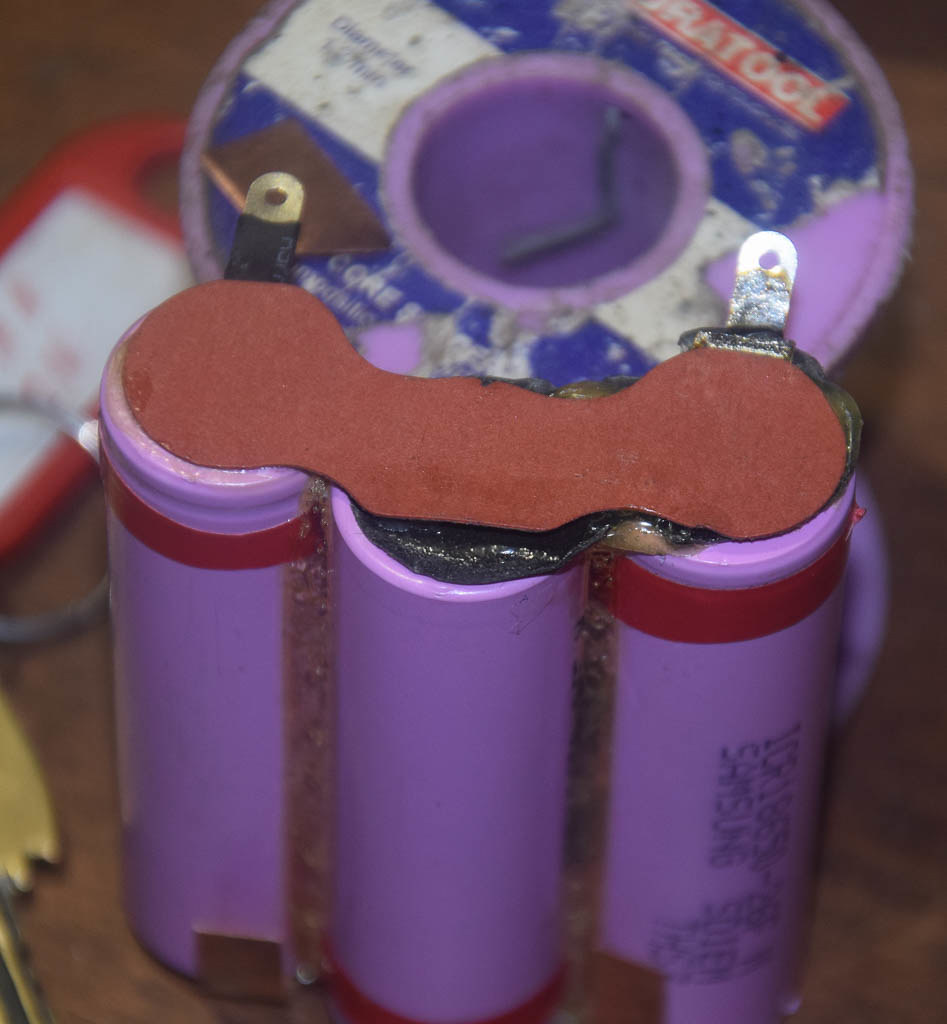 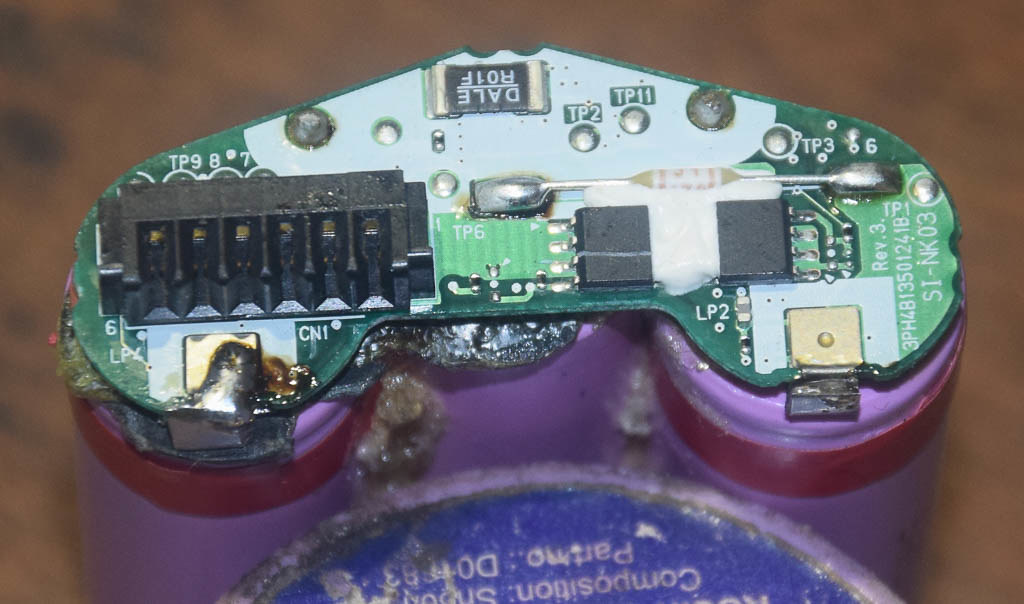 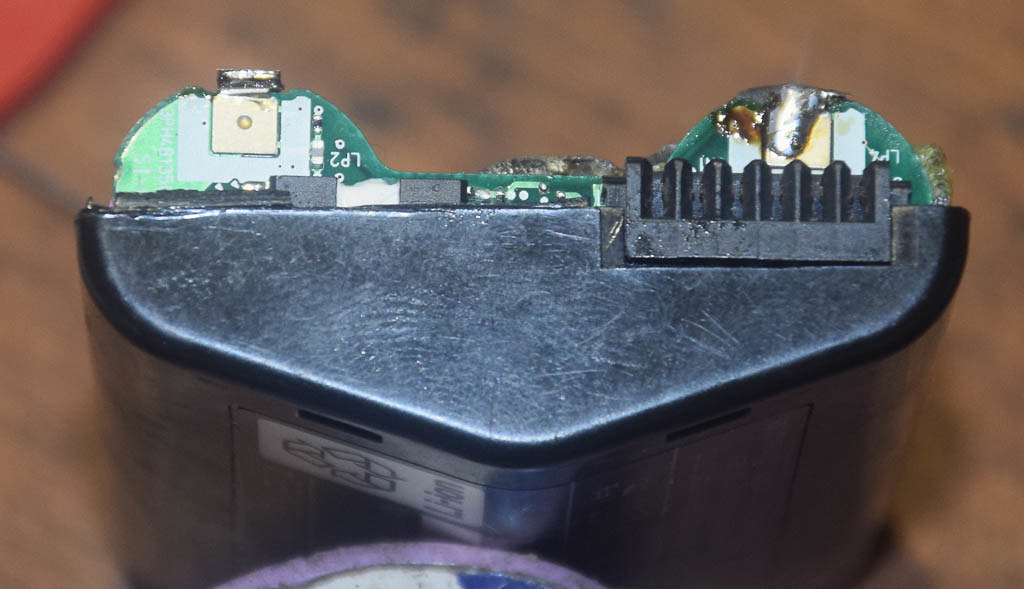 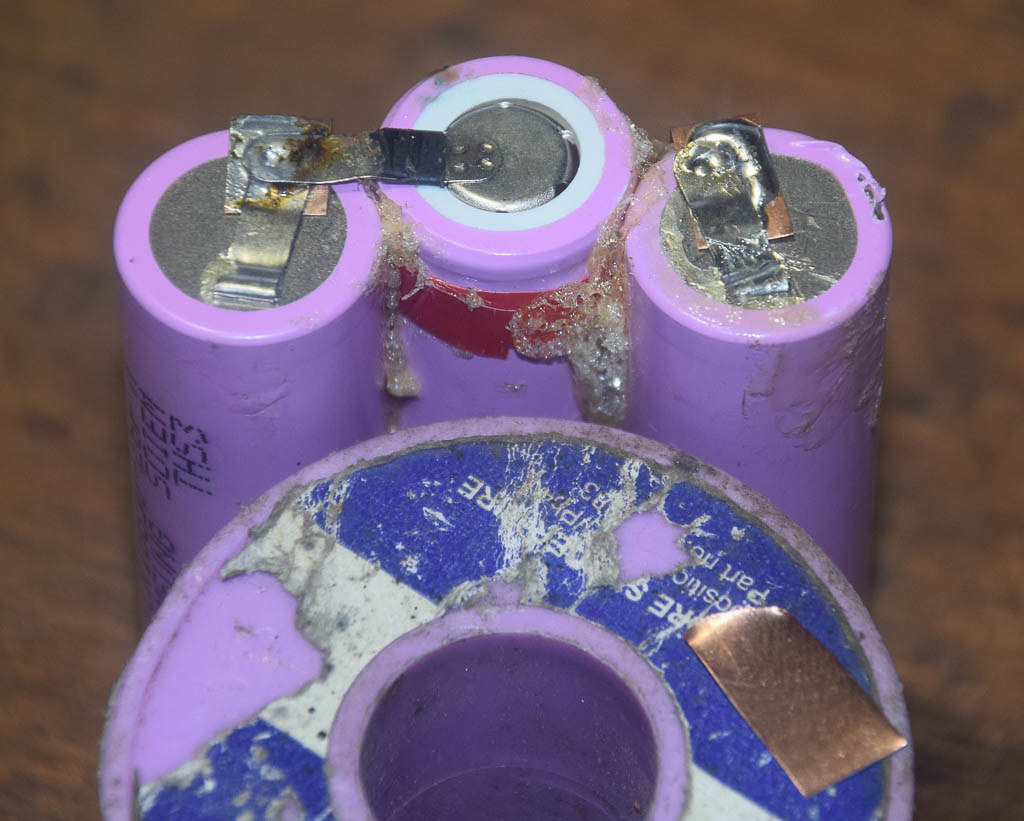 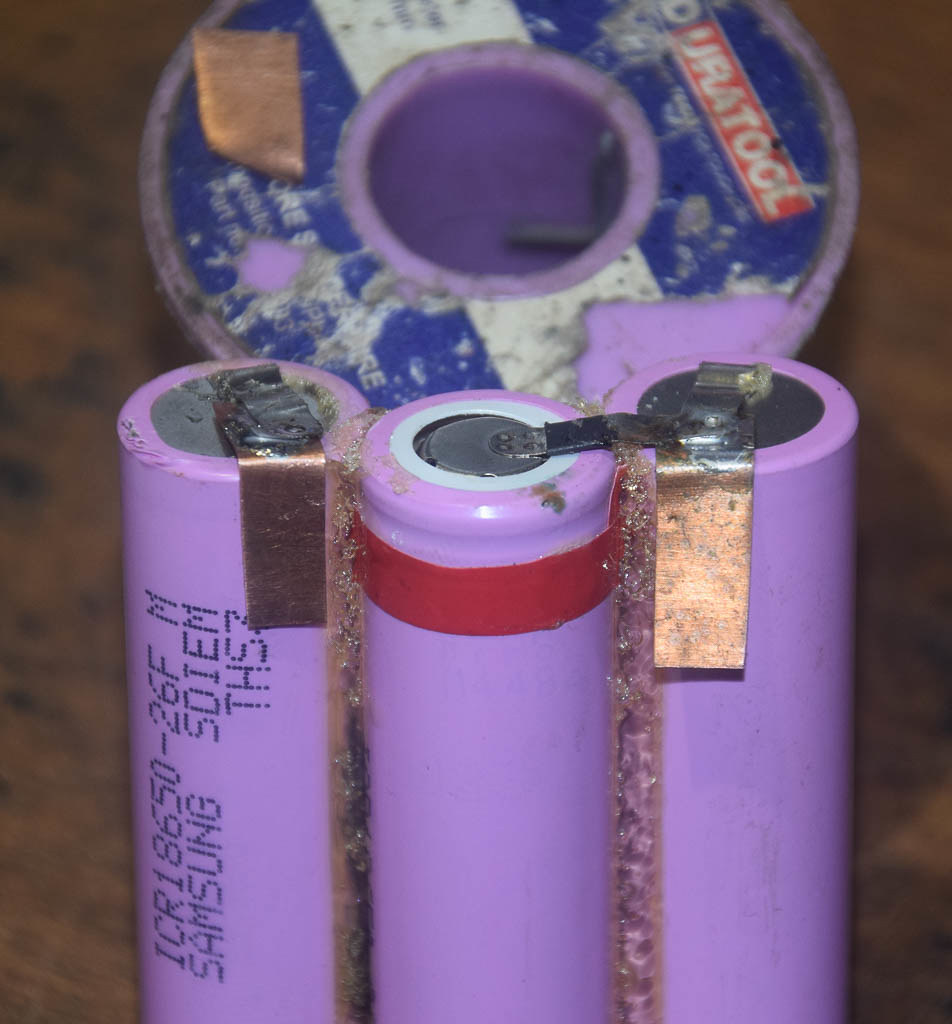  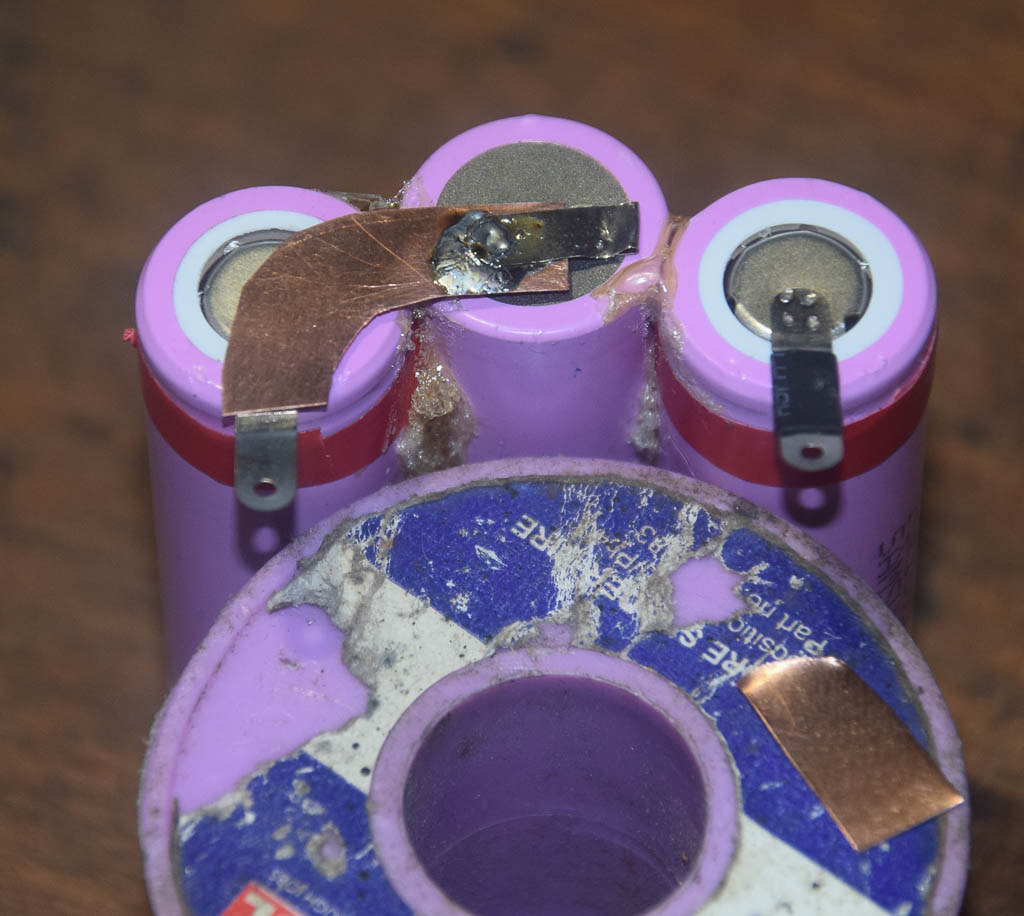 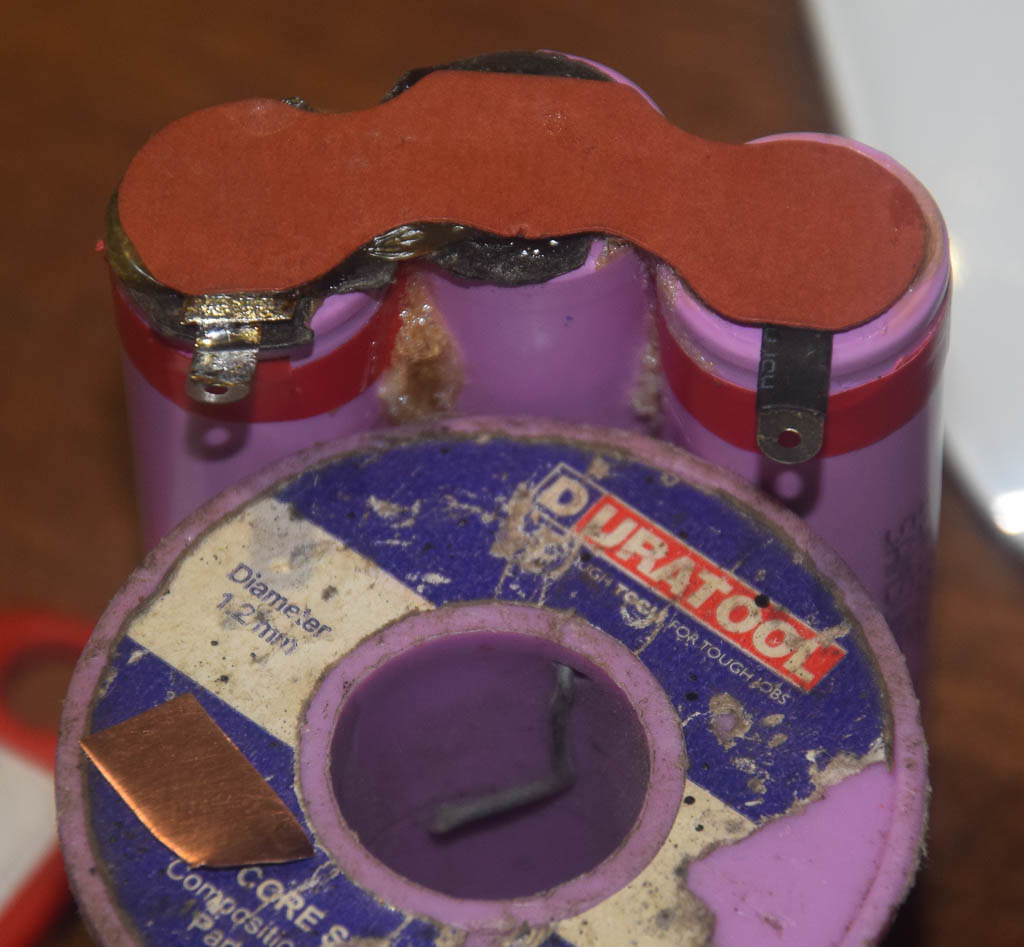 Not as neat as I would like but it's working, it has completed the re-calibration but the camera still thinks it's on life 4.  The copper strips are 7 thou of an inch thick, 0.18mm, I calculated they are at least 1.2 sq. mm cross section and are greater than the new Samsung battery tags which are also 7 thou thick. I am thinking the copper should also be lower resistance than nickel plated steel. I have epoxied the casing back together so in the morning it will probably be as good as it gets. Not sure if I feel like doing a second one, I will see how this one fares first.
____________________ Robert. |
||||||||
|
| |||||||||
| Posted: Thu Feb 15th, 2018 16:29 |
|
24th Post |
jk

|
Well done. First one is always the most difficult.
____________________ Still learning after all these years! https://nikondslr.uk/gallery_view.php?user=2&folderid=none |
||||||||
|
| |||||||||
| Posted: Thu Feb 15th, 2018 17:03 |
|
25th Post |
Robert
|
 I know, the D1 battery was even more difficult. I guess that experience has helped here. I posted the photo's to give anyone else contemplating the task a better idea of what to expect. One other thing... When carefully splitting the case, the cells are stuck to the bottom half with thin, double sided sticky tape, that is with the Nikon label being the top. I progressed it one step at a time, now the case is together I will let the epoxy two pack glue set well overnight. Tomorrow will label it and trim any roughness off the seams, then go take some photos! 
____________________ Robert. |
||||||||
|
| |||||||||
| Posted: Fri Feb 16th, 2018 02:46 |
|
26th Post |
Robert
|
The glue has hardened overnight, removed the clamping tape I wrapped it with and it fits in the D3 perfectly. I have taken a set of photos of the case, the seams are pretty good except for the corner near the connection socket. There is slight displacement there, I think when I took the case apart I tried to keep clear of the socket with my knife and the corner may have been distorted when I pulled it apart. Other than that it's pretty well perfect. Just hope there won't be any long term issues or the chip inside decide it won't take charge any more... Am slightly annoyed the 're-calibration' hasn't actually reset the chip. I guess that's too much to hope for.  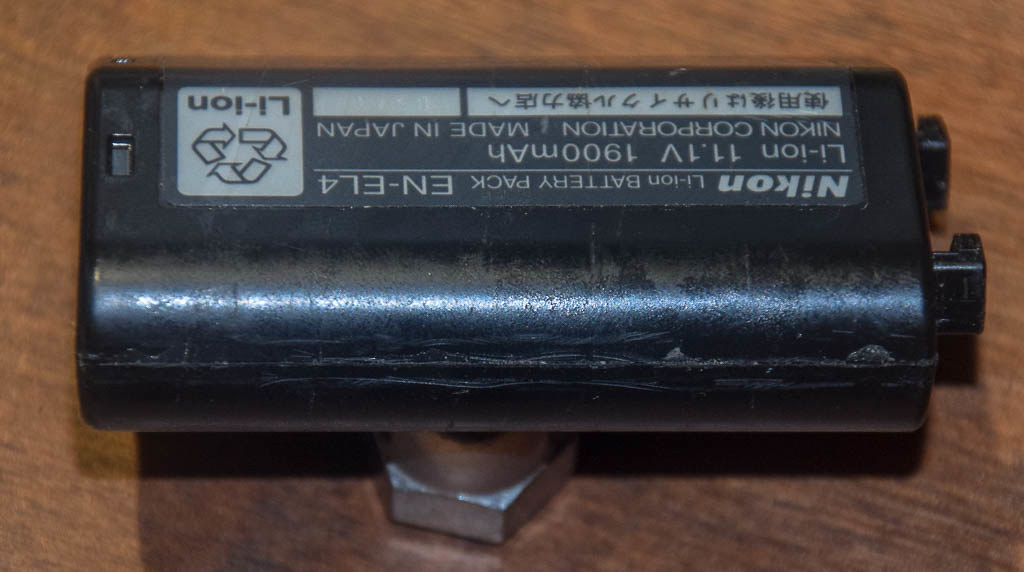 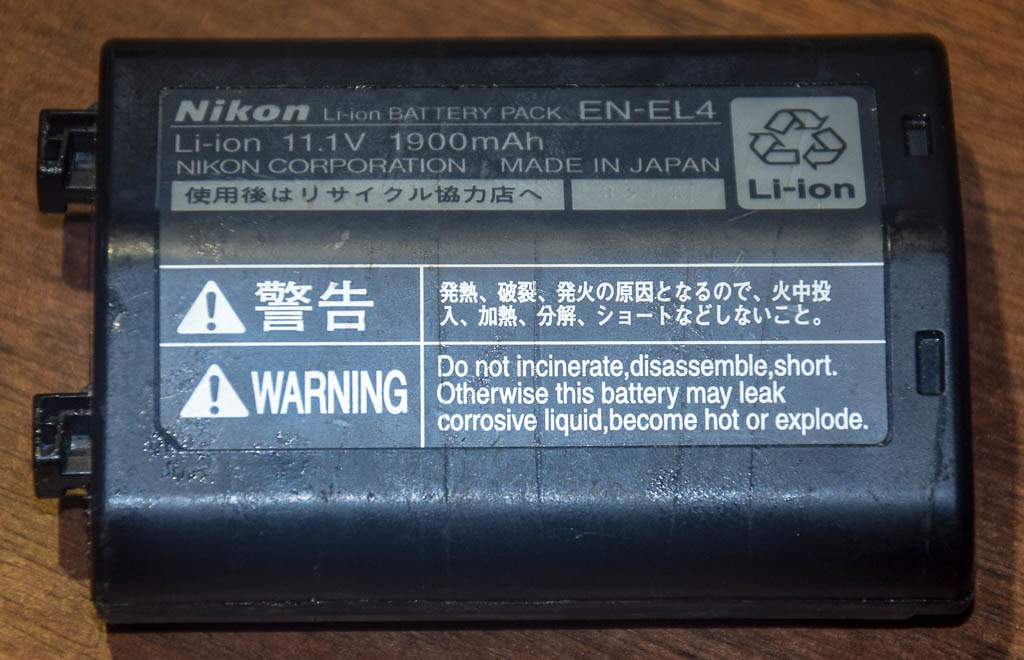 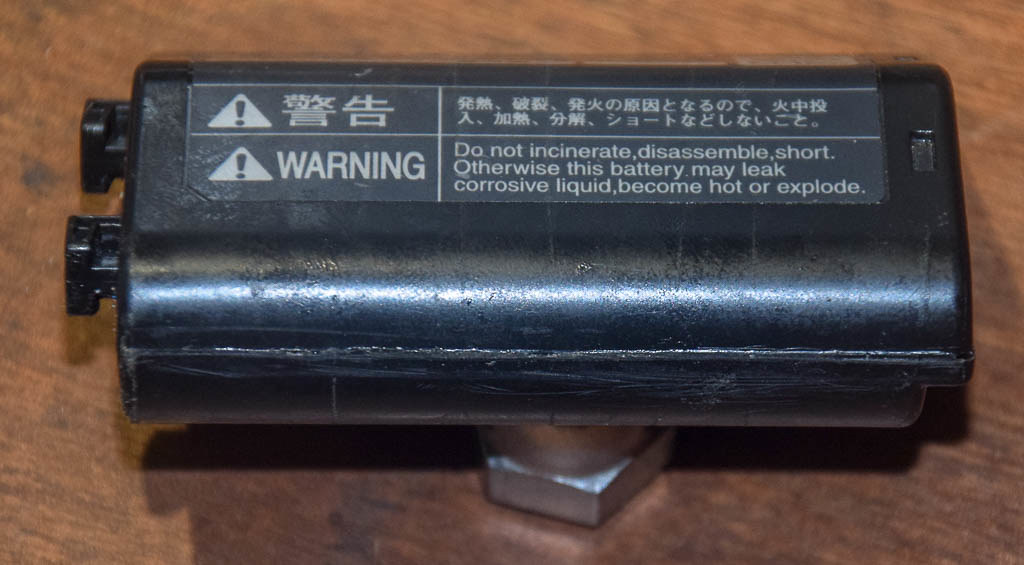 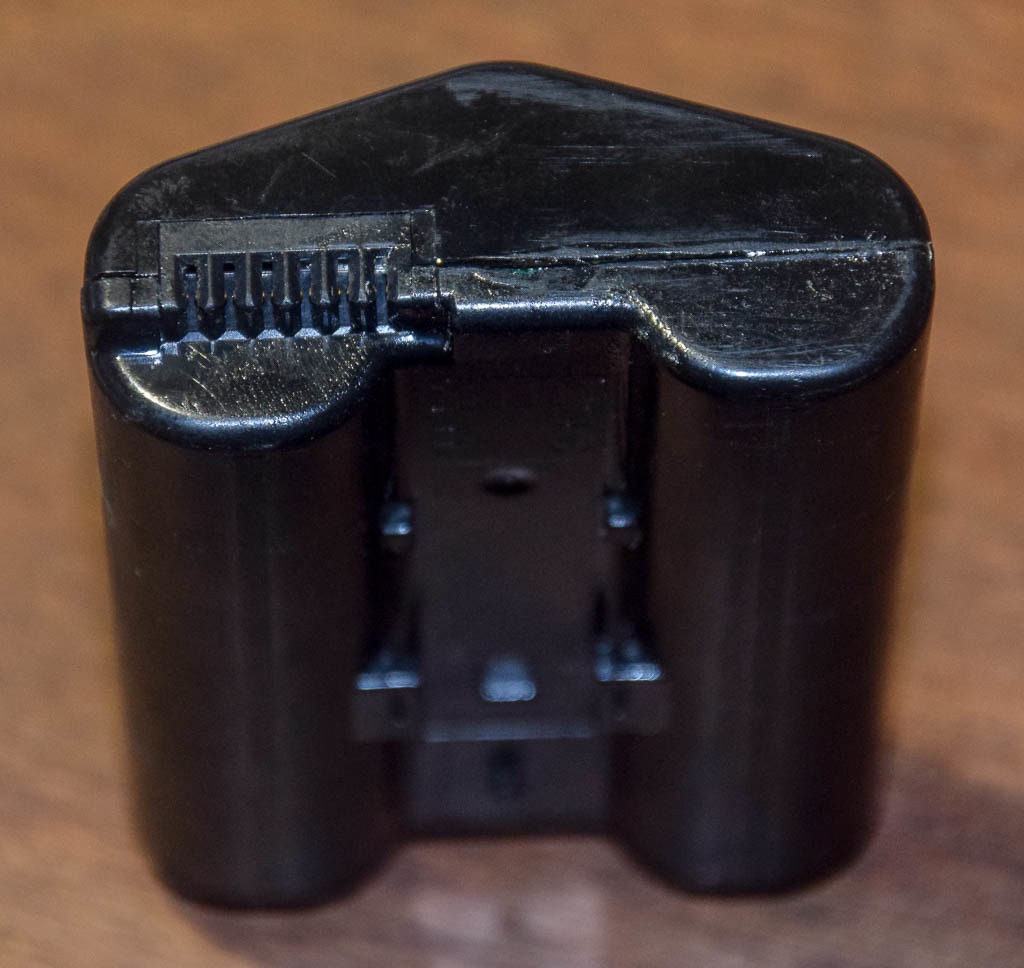 I think that's enough excitement for now! Need to get out and take some photographs.
____________________ Robert. |
||||||||
|
| |||||||||
| Posted: Fri Aug 31st, 2018 09:06 |
|
27th Post |
GeoffR
|
For what it is worth, the battery life counter appears to be a hardware function and cannot be reset. Unless someone knows otherwise.
|
||||||||
|
| |||||||||
| This is topic ID = 1496 Current time is 01:48 | Page: | |
| Nikon DSLR Forums > Light, Lighting Techniques, Strobes and LEDs Forums > Build It Yourself > Re-celling an EN-EL4 battery | Top | |
Users viewing this topic |
||
Current theme is Modern editor
| A small amount of member data is captured and held in an attempt to reduce spammers and to manage users. This site also uses cookies to ensure ease of use. In order to comply with new DPR regulations you are required to agree/disagree with this process. If you do not agree then please email the Admins using info@nikondslr.uk Thank you. |
Hosted by Octarine Services
UltraBB 1.173 Copyright © 2008-2026 Data 1 Systems
Page processed in 0.0467 seconds (66% database + 34% PHP). 65 queries executed.
UltraBB 1.173 Copyright © 2008-2026 Data 1 Systems
Page processed in 0.0467 seconds (66% database + 34% PHP). 65 queries executed.